Nachfolgend die Beschreibung der Installation des Server-Control-Panels, ISPConfig 3, unter Ubuntu Server. Es werden Apache2, PHP, MySQL, PureFTPD, Bind, Postfix und Davecot installiert.
Zuvor hatte ich den Ubuntu Server frisch wie hier beschrieben, installiert. Nachfolgend installiere ich ISPConfig auf dem Ubuntu Server 16.4 LTS alias Xenial Xerus.https://www.taste-of-it.de/installation-ubuntu-server/
als Root durchgehend arbeiten
Damit ich nicht bei jedem Befehl mittels sudo das Root Passwort eingeben muss, mache ich mich kurzherhand dauerhaft zu ROOT : # sudo -i
Ubuntu Sources List anpassen
Die Standard Sources List sieht wie folgt aus:
# deb cdrom:[Ubuntu-Server 16.04 LTS _Xenial Xerus_ - Release amd64 (20160420)]/ xenial main restricted

#deb cdrom:[Ubuntu-Server 16.04 LTS _Xenial Xerus_ - Release amd64 (20160420)]/ xenial main restricted

# See http://help.ubuntu.com/community/UpgradeNotes for how to upgrade to
# newer versions of the distribution.
deb http://de.archive.ubuntu.com/ubuntu/ xenial main restricted
# deb-src http://de.archive.ubuntu.com/ubuntu/ xenial main restricted

## Major bug fix updates produced after the final release of the
## distribution.
deb http://de.archive.ubuntu.com/ubuntu/ xenial-updates main restricted
# deb-src http://de.archive.ubuntu.com/ubuntu/ xenial-updates main restricted

## N.B. software from this repository is ENTIRELY UNSUPPORTED by the Ubuntu
## team, and may not be under a free licence. Please satisfy yourself as to
## your rights to use the software. Also, please note that software in
## universe WILL NOT receive any review or updates from the Ubuntu security
## team.
deb http://de.archive.ubuntu.com/ubuntu/ xenial universe
# deb-src http://de.archive.ubuntu.com/ubuntu/ xenial universe
deb http://de.archive.ubuntu.com/ubuntu/ xenial-updates universe
# deb-src http://de.archive.ubuntu.com/ubuntu/ xenial-updates universe

## N.B. software from this repository is ENTIRELY UNSUPPORTED by the Ubuntu
## team, and may not be under a free licence. Please satisfy yourself as to
## your rights to use the software. Also, please note that software in
## multiverse WILL NOT receive any review or updates from the Ubuntu
## security team.
deb http://de.archive.ubuntu.com/ubuntu/ xenial multiverse
# deb-src http://de.archive.ubuntu.com/ubuntu/ xenial multiverse
deb http://de.archive.ubuntu.com/ubuntu/ xenial-updates multiverse
# deb-src http://de.archive.ubuntu.com/ubuntu/ xenial-updates multiverse

## N.B. software from this repository may not have been tested as
## extensively as that contained in the main release, although it includes
## newer versions of some applications which may provide useful features.
## Also, please note that software in backports WILL NOT receive any review
## or updates from the Ubuntu security team.
deb http://de.archive.ubuntu.com/ubuntu/ xenial-backports main restricted universe multiverse
# deb-src http://de.archive.ubuntu.com/ubuntu/ xenial-backports main restricted universe multiverse
## Uncomment the following two lines to add software from Canonical's
## 'partner' repository.
## This software is not part of Ubuntu, but is offered by Canonical and the
## respective vendors as a service to Ubuntu users.
# deb http://archive.canonical.com/ubuntu xenial partner
# deb-src http://archive.canonical.com/ubuntu xenial partner

deb http://security.ubuntu.com/ubuntu xenial-security main restricted
# deb-src http://security.ubuntu.com/ubuntu xenial-security main restricted
deb http://security.ubuntu.com/ubuntu xenial-security universe
# deb-src http://security.ubuntu.com/ubuntu xenial-security universe
deb http://security.ubuntu.com/ubuntu xenial-security multiverse
# deb-src http://security.ubuntu.com/ubuntu xenial-security multiverse
Nun noch ein:
- sudo apt-get update && apt-get ugprade
- reboot
Ändern der Default Shell
- # dpkg-reconfigure dash
- /bin/sh <- No auswählen

AppArmor deaktivieren (optional)
AppArmor ist an sich nicht schlecht, bereitet jedoch oft Probleme. Ubuntu kann auch anders sicher konfiguriert werden, daher werde ich es hier deaktivieren und deinstallieren:
- service apparmor stop
- update-rc.d -f apparmor remove
- apt-get remove –purge
- apparmor apparmor-utils
NTP Dienst zum Zeitsynchronisieren installieren
- # apt-get -y install ntp ntpdate
Postfix, Dovecot, MariaDB, rkhunter und binutils installieren
- zuvor Sendmail entfernen:
- # service sendmail stop
- update-rc.d -f sendmail remove
- nun Postfix, MariaDB, OpenSSL, rkhunter, Dovecot etc. instalieren:
- # apt-get install postfix postfix-mysql postfix-doc mariadb-client mariadb-server openssl getmail4 rkhunter binutils dovecot-imapd dovecot-pop3d dovecot-mysql dovecot-sieve dovecot-lmtpd sudo
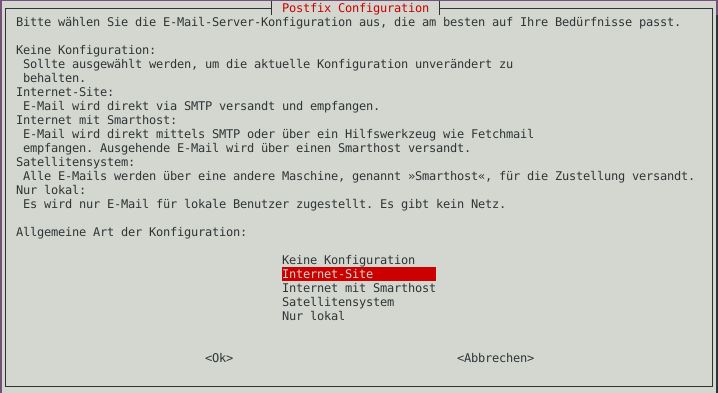
- Postfix Art der Konfiguration = Internet Site auswählen

- Systemmail dann den FQDN eintragen: server.domain.tld, auf jeden Fall eine Supdomain verwenden
- Postfix TLS/SSL aktivieren und lediglich folgende Rauten entfernen, nicht die Leerzeichen vor dem -o:
- # nano /etc/postfix/master.cf:
[...]
submission inet n       -       -       -       -       smtpd
  -o syslog_name=postfix/submission
  -o smtpd_tls_security_level=encrypt
  -o smtpd_sasl_auth_enable=yes
  -o smtpd_client_restrictions=permit_sasl_authenticated,reject
#  -o smtpd_reject_unlisted_recipient=no
#  -o smtpd_client_restrictions=$mua_client_restrictions
#  -o smtpd_helo_restrictions=$mua_helo_restrictions
#  -o smtpd_sender_restrictions=$mua_sender_restrictions
#  -o smtpd_recipient_restrictions=permit_sasl_authenticated,reject
#  -o milter_macro_daemon_name=ORIGINATING
smtps     inet  n       -       -       -       -       smtpd
  -o syslog_name=postfix/smtps
  -o smtpd_tls_wrappermode=yes
  -o smtpd_sasl_auth_enable=yes
  -o smtpd_client_restrictions=permit_sasl_authenticated,reject
#  -o smtpd_reject_unlisted_recipient=no
#  -o smtpd_client_restrictions=$mua_client_restrictions
#  -o smtpd_helo_restrictions=$mua_helo_restrictions
#  -o smtpd_sender_restrictions=$mua_sender_restrictions
#  -o smtpd_recipient_restrictions=permit_sasl_authenticated,reject
#  -o milter_macro_daemon_name=ORIGINATING
[...]- Nun den Postfix-Dienst neustarten:
- # service postfix restart
- damit MariaDB / MySQL auch von extern erreichbar ist, wer es möchte, muss den Bind auf 127.0.0.1 / localhost deaktivieren: # nano /etc/mysql/mariadb.conf.d/50-server.cnf
- # bind-address = 127.0.0.1
- neues Passwort für MariaDB setzen:
- # mysql_secure_installation
- Enter current password for root: <Enter>
- Set root password: Y
- New password: <neues Passwort>
- Re-enter new password: <nochmal>
- Remove anonymous users: y
- Disallow root login remotely: y
- Reload privilege tables now: y
- # mysql_secure_installation
- Neustart von MariaDB:
- # service mysql restart
- prüfen ob Mysql läuft:
- netstat -tap | grep mysql
Installation von Amavisd-new, SpamAssassin und ClamAV
Ich hatte im ersten Anlauf folgenden Fehler:
Creating/updating amavis user account…Job for amavis.service failed because the control process exited with error code.
Lösung zuvor den Hostnamen / den FQDN zu validieren:
- # hostname set-hostname server1.domain.tld
apt-get install amavisd-new spamassassin clamav clamav-daemon zoo unzip bzip2 arj nomarch lzop cabextract apt-listchanges libnet-ldap-perl libauthen-sasl-perl clamav-docs daemon libio-string-perl libio-socket-ssl-perl libnet-ident-perl zip libnet-dns-perl postgreyDa ISPConfig Amavisd nutzt, was die Filter von Spamassassin läd, können wir Spamassassin direkt stoppen und ein doppeltes laden und RAM verbrauchen stoppen:
- service spamassassin stop
- update-rc.d -f spamassassin remove
Nun noch ClamAV konfigurieren und wie folgt ändern bzw an das Ende der Konfiguration schreiben:
- # nano /etc/clamav/clamd.conf
- AllowSupplementaryGroups tru
- # freshclam
- # service clamav-daemon start
- Warning kann ignoriert werden, da der Daemon später gestartet wird
Installation Apache2, PHP FCGI, SuExec, Pear, MCrypt
Als nächstes wird der Webserver Apache2 mit PHP 7.0, PHPMyadmin, FCGI, PEAR und weiteren Modulen installiert:
apt-get install apache2 apache2-doc apache2-utils libapache2-mod-php php7.0 php7.0-common php7.0-gd php7.0-mysql php7.0-imap phpmyadmin php7.0-cli php7.0-cgi libapache2-mod-fcgid apache2-suexec-pristine php-pear php-auth php7.0-mcrypt mcrypt imagemagick libruby libapache2-mod-python php7.0-curl php7.0-intl php7.0-pspell php7.0-recode php7.0-sqlite3 php7.0-tidy php7.0-xmlrpc php7.0-xsl memcached php-memcache php-imagick php-gettext php7.0-zip php7.0-mbstring
Bei den Fragen entsprechend als Webserver Apache2 auswählen, PHPMyAdmin mit dbconfig-common konfigurieren und das Passwort für PHPMyAdmin eingeben.

Ubuntu ISPConfig PHPMyAdmin 
Ubuntu ISPConfig PHPMyAdmin 
Ubuntu ISPConfig PHPMyAdmin
Nun noch die Apache Module aktivieren:
- # a2enmod suexec rewrite ssl actions include cgi
Wer noch WebDAV nutzen möchte der aktiviert noch diese Module:
- # a2enmod dav_fs dav auth_digest headers
Webserver gegen HTTPOXY Angriff absichern:
- # nano /etc/apache2/conf-available/httpoxy.conf
<IfModule mod_headers.c>
    RequestHeader unset Proxy early
</IfModule>
Nun die Konfiguration aktivieren und den Webserver neustarten:
- # a2enconf httpoxy
- # service apache2 restart
PHP Pcode Cache installieren
- # apt-get install php7.0-opcache php-apcu
- # service apache2 restart
PHP-FPM für Apache installieren
- # apt-get install libapache2-mod-fastcgi php7.0-fpm
- # a2enmod actions fastcgi alias
- # service apache2 restart
Lets Encrypt installieren
Lets encrypt Client für SSL Zertifikate einrichten:
- # apt-get install software-properties-common
- # add-apt-repository ppa:certbot/certbot
- # apt update
- # apt -y remove letsencrypt
- # apt -y install python-certbot-apache
PureFTPd und Quota installieren
- # apt-get install pure-ftpd-common pure-ftpd-mysql quota quotatool
- # nano /etc/default/pure-ftpd-common
Folgende Konfiguration muss gesetzt sein:
STANDALONE_OR_INETD=standalone
VIRTUALCHROOT=true
Nun PureFTPd mittels TLS konfigurieren:
- # echo 1 > /etc/pure-ftpd/conf/TLS
Nun noch ein eigenes SSL Zertifikat erstellen:
- # mkdir -p /etc/ssl/private/
- # openssl req -x509 -nodes -days 7300 -newkey rsa:2048 -keyout /etc/ssl/private/pure-ftpd.pem -out /etc/ssl/private/pure-ftpd.pem
- # chmod 600 /etc/ssl/private/pure-ftpd.pem
- # service pure-ftpd-mysql restart
PureFTPd Quota einrichten:
- # nano /etc/fstab
- /dev/mapper/server1–vg-root / ext4 errors=remount-ro,usrjquota=quota.user,grpjquota=quota.group,jqfmt=vfsv0 0 1
- # mount -o remount /
- # quotacheck -avugm
- # quotaon -avug
BIND DNS Server installieren
- # apt-get install bind9 dnsutils haveged
Vlogger, Webalizer, AWStas installieren
- # apt-get install vlogger webalizer awstats geoip-database libclass-dbi-mysql-perl
Cron prüfen und ggf. korrgieren
MAILTO=root

*/10 * * * * www-data [ -x /usr/share/awstats/tools/update.sh ] && /usr/share/awstats/tools/update.sh

# Generate static reports:
10 03 * * * www-data [ -x /usr/share/awstats/tools/buildstatic.sh ] && /usr/share/awstats/tools/buildstatic.sh
Jailkit für Chroot SSH User installieren
!Achtung Jailkit muss vor ISPConfig installiert werden
# apt-get install build-essential autoconf automake1.11 libtool flex bison debhelper binutils
# cd /tmp
# wget http://olivier.sessink.nl/jailkit/jailkit-2.20.tar.gz
# tar xvfz jailkit-2.20.tar.gz
# cd jailkit-2.20
# ./debian/rules binary
# cd ..
# dpkg -i jailkit_2.20-1_amd64.deb
# rm -rf jailkit-2.20*
Fail2Ban und UFW installieren (optional)
- # apt-get install fail2ban
Fail2Ban für PureFTDd, Dovecot und Postfix einrichten
- # nano /etc/fail2ban/jail.local
[pureftpd]
enabled  = true
port     = ftp
filter   = pureftpd
logpath  = /var/log/syslog
maxretry = 3

[dovecot-pop3imap]
enabled = true
filter = dovecot-pop3imap
action = iptables-multiport[name=dovecot-pop3imap, port="pop3,pop3s,imap,imaps", protocol=tcp]
logpath = /var/log/mail.log
maxretry = 5

[postfix-sasl]
enabled  = true
port     = smtp
filter   = postfix-sasl
logpath  = /var/log/mail.log
maxretry = 3- # nano /etc/fail2ban/filter.d/pureftpd.conf
[Definition]
failregex = .*pure-ftpd: \(.*@<HOST>\) \[WARNING\] Authentication failed for user.*
ignoreregex =- # nano /etc/fail2ban/filter.d/dovecot-pop3imap.conf
[Definition]
failregex = (?: pop3-login|imap-login): .*(?:Authentication failure|Aborted login \(auth failed|Aborted login \(tried to use disabled|Disconnected \(auth failed|Aborted login \(\d+ authentication attempts).*rip=(?P<host>\S*),.*
ignoreregex =- # echo “ignoreregex =” >> /etc/fail2ban/filter.d/postfix-sasl.conf
- # service fail2ban restart
- # apt-get install ufw
Webmail Roundcube installieren
- # apt-get install roundcube roundcube-core roundcube-mysql roundcube-plugins roundcube-plugins-extra javascript-common libjs-jquery-mousewheel php-net-sieve tinymce
- Datenbank für Roundcube konfigurieren auswählen
- beim Anwendungspasswort einfach Enter drücken

nun die Konfiguration anpassen:
- # nano /etc/apache2/conf-enabled/roundcube.conf
die Alias Zeile aktivieren, also die Raute entfernen und die Zeile AddType application/x-httpd-php .php direkt unter <Directory /var/lib/roundcube> hinzufügen
# Those aliases do not work properly with several hosts on your apache server
# Uncomment them to use it or adapt them to your configuration
Alias /roundcube /var/lib/roundcube
[...]
<Directory /var/lib/roundcube>
AddType application/x-httpd-php .php
[...]- # service apache2 restart
- # nano /etc/roundcube/config.inc.php
- und host zu localhost ändern:
- $config[‘default_host’] = ‘localhost’;
Fix für Login von Root in PHPMyAdmin
Damit sich Root in PHPMyAdmin anmelden kann muss das MariaDB Modul “unix_socket” deaktiviert werden:
- # echo “update user set plugin=” where User=’root’;” | mysql -root -p mysql
ISPConfig installieren
# cd /tmp
# wget -O ispconfig.tar.gz https://git.ispconfig.org/ispconfig/ispconfig3/repository/archive.tar.gz?ref=stable-3.1
# tar xfz ispconfig.tar.gz
# cd ispconfig3*/install/
# php -q install.php
--------------------------------------------------------------------------------
_____ ___________ _____ __ _ ____
|_ _/ ___| ___ \ / __ \ / _(_) /__ \
| | \ `--.| |_/ / | / \/ ___ _ __ | |_ _ __ _ _/ /
| | `--. \ __/ | | / _ \| '_ \| _| |/ _` | |_ |
_| |_/\__/ / | | \__/\ (_) | | | | | | | (_| | ___\ \
\___/\____/\_| \____/\___/|_| |_|_| |_|\__, | \____/
__/ |
|___/
--------------------------------------------------------------------------------
>> Initial configuration
Operating System: Ubuntu 16.04.5 LTS (Xenial Xerus)
Following will be a few questions for primary configuration so be careful.
Default values are in [brackets] and can be accepted with <ENTER>.
Tap in "quit" (without the quotes) to stop the installer.
Select language (en,de) [en]: de
Installation mode (standard,expert) [standard]:<Enter>
Full qualified hostname (FQDN) of the server, eg server1.domain.tld [server1.domain.tld]:
MySQL server hostname [localhost]:<Enter>
MySQL server port [3306]:<Enter>
MySQL root username [root]:<Enter>
MySQL root password []: <Passwort>
MySQL database to create [dbispconfig]:<Enter>
MySQL charset [utf8]:<Enter>
Configuring Postgrey
Configuring Postfix
Generating a 4096 bit RSA private key
..................++
...........................................................................++
writing new private key to 'smtpd.key'
-----
[INFO] service Mailman not detected
Configuring Dovecot
Configuring Spamassassin
Configuring Amavisd
Configuring Getmail
Configuring Jailkit
Configuring Pureftpd
Configuring BIND
Configuring Apache
Configuring vlogger
[INFO] service OpenVZ not detected
Configuring Ubuntu Firewall
[INFO] service Metronome XMPP Server not detected
Configuring Fail2ban
Configuring Apps vhost
Installing ISPConfig
ISPConfig Port [8080]:<Enter>
Admin password [01a8a37f]: <Passwort>
Re-enter admin password []: <Passwort>
Do you want a secure (SSL) connection to the ISPConfig web interface (y,n) [y]:
Generating RSA private key, 4096 bit long modulus
..............................................................................++
Configuring DBServer
Installing ISPConfig crontab
Installing ISPConfig crontab
no crontab for root
no crontab for getmail
Detect IP addresses
Restarting services ...
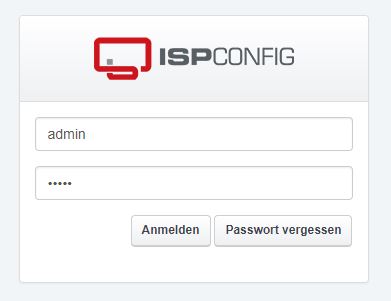
Installation completed.Damit ist ISPConfig installiert und das Panel kann über einen Browser aufgerufen werden. Benutzer ist admin und das Passwort ist oben aus der Installation.
- http(s)://server1.domain.tld:8080/
- oder der http(s)://IP-Adresse:8080

Interessiert in verschiedenste IT Themen, schreibe ich in diesem Blog über Software, Hardware, Smart Home, Games und vieles mehr. Ich berichte z.B. über die Installation und Konfiguration von Software als auch von Problemen mit dieser. News sind ebenso spannend, sodass ich auch über Updates, Releases und Neuigkeiten aus der IT berichte. Letztendlich nutze ich Taste-of-IT als eigene Dokumentation und Anlaufstelle bei wiederkehrenden Themen. Ich hoffe ich kann dich ebenso informieren und bei Problemen eine schnelle Lösung anbieten. Wer meinen Aufwand unterstützen möchte, kann gerne eine Tasse oder Pod Kaffe per PayPal spenden – vielen Dank.
