Was ist Pi-hole?
Pi-hole ist eine freie Software die als DNS Server Werbung und Trackingcookies und Scripte blockiert. Sie kann durch weitere frei erhältliche Listen erweitert werden und kann optional als DHCP Server für das lokale Netzwerk konfiguriert werden. Pi-hole kann auf Kleinstrechnern wie dem Raspberry Pi installiert werden.
Ich möchte den DNS-Proxy, Pi-hole installieren und in meine Systemlandschaft einbinden. Pi-hole läuft nicht nur auf einen Raspberry Pi, sondern auch auf:
- Ubuntu
- Debian
- Fedora
- CentOS
Die Anforderungen an das System sind entsprechend recht gering und werden mit:
- 52MB freier Speicherplatz
- 512MB Arbeitsspeicher
angegeben. Beim freien Festplattenspeicher kann ich nicht ganz folgen, da hier je nach eingebundenen Blocklisten und Clientanzahl mehr als 10GB 24GB freier Speicherplatz notwendig werden.
Vorbereitung in Proxmox KVM mit Debian Netinstall
Ich möchte keinen zusätzlichen Rechner / Raspberry Pi anschaffen und aufbauen, und habe daher Pi-hole in meine virtuelle Infrastruktur unter Proxmox als KVM Virtualisierung eingerichtet.
Auf Grund der geringen Anforderungen habe ich folgende Settings für die VM verwendet:
- Linux Kernel 4.x/3.x/2.6
- Bus/Device VirtIO SCSI
- Disk-Größe 16GB
- kein Cache
- 1 Socket 1 Core mit kvm64 und NUMA
- 512MB Arbeitsspeicher
- VirtIO Netzwerkadapter
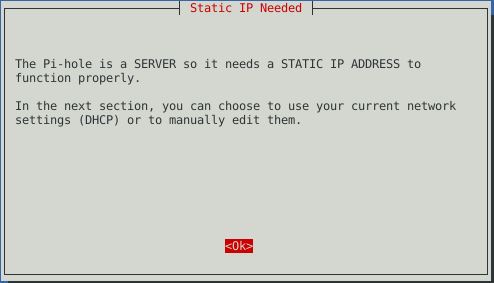
Die IP-Adresse muss fest vergeben oder per DHCP reserviert werden.
Installation benötigter Software
# apt-get install curlPi-hole in Debian installieren
Für die Installation selbst verwende ich das offizielle Installationsscript von Pi-hole:
# curl -sSL https://install.pi-hole.net | bashDie Installation und der Status der einzelnen Checks sieht in der Konsole wie folgt aus:
 stty: Standardeingabe: Unpassender IOCTL (I/O-Control) für das Gerät

  [✓] Root user check

        .;;,.
        .ccccc:,.
         :cccclll:.      ..,,
          :ccccclll.   ;ooodc
           'ccll:;ll .oooodc
             .;cll.;;looo:.
                 .. ','.
                .',,,,,,'.
              .',,,,,,,,,,.
            .',,,,,,,,,,,,....
          ....''',,,,,,,'.......
        .........  ....  .........
        ..........      ..........
        ..........      ..........
        .........  ....  .........
          ........,,,,,,,'......
            ....',,,,,,,,,,,,.
               .',,,,,,,,,'.
                .',,,,,,'.
                  ..'''.

  [✓] Disk space check
  [✓] Update local cache of available packages

  [✓] Checking apt-get for upgraded packages... up to date!

  [i] Installer Dependency checks...
  [✓] Checking for apt-utils
  [i] Checking for dialog (will be installed)
  [✓] Checking for debconf
  [i] Checking for dhcpcd5 (will be installed)
  [i] Checking for git (will be installed)
  [✓] Checking for iproute2
  [✓] Checking for whiptail
  [i] Using Quad9 servers
  [i] Your static IPv4 address: xx.xx.xx.xx/24
  [i] Your static IPv4 gateway: xx.xx.xx.xx
  [✓] Set IP address to xx.xx.x.xx
  You may need to restart after the install is complete
  [i] Unable to find IPv6 ULA/GUA address, IPv6 adblocking will not be enabled
  [i] IPv4 address: xx.xx.xx.xx/24
  [i] IPv6 address:
  [i] Web Interface On
  [i] Web Server On
  [i] Logging On.
  [✗] Check for existing repository in /etc/.pihole
  [✓] Clone https://github.com/pi-hole/pi-hole.git into /etc/.pihole

  [✗] Check for existing repository in /var/www/html/admin
  [✓] Clone https://github.com/pi-hole/AdminLTE.git into /var/www/html/admin

  [i] Main Dependency checks...
  [✓] Checking for cron
  [✓] Checking for curl
  [i] Checking for dnsutils (will be installed)
  [✓] Checking for iputils-ping
  [✓] Checking for lsof
  [i] Checking for netcat (will be installed)
  [i] Checking for psmisc (will be installed)
  [i] Checking for sudo (will be installed)
  [i] Checking for unzip (will be installed)
  [✓] Checking for wget
  [i] Checking for idn2 (will be installed)
  [i] Checking for sqlite3 (will be installed)
  [i] Checking for libcap2-bin (will be installed)
  [i] Checking for dns-root-data (will be installed)
  [i] Checking for resolvconf (will be installed)
  [✓] Checking for libcap2
  [i] Checking for lighttpd (will be installed)
  [i] Checking for php-common (will be installed)
  [i] Checking for php-cgi (will be installed)
  [i] Checking for php-sqlite3 (will be installed)
  [✓] Enabling lighttpd service to start on reboot...

  [i] FTL Checks...

  [✓] Detected x86_64 architecture
  [i] Checking for existing FTL binary...
  [✓] Downloading and Installing FTL
  [✓] Creating user 'pihole'
  [✓] Installing scripts from /etc/.pihole

  [i] Installing configs from /etc/.pihole...
  [✓] No dnsmasq.conf found... restoring default dnsmasq.conf...
  [✓] Copying 01-pihole.conf to /etc/dnsmasq.d/01-pihole.conf

  [i] Installing blocking page...
  [✓] Creating directory for blocking page, and copying files
  [✓] Backing up index.lighttpd.html

  [✓] Installing sudoer file

  [✓] Installing latest Cron script

  [✓] Installing latest logrotate script
  [i] Backing up /etc/dnsmasq.conf to /etc/dnsmasq.conf.old

  [i] Skipping firewall configuration
  [✓] man pages installed and database updated
  [i] Testing if systemd-resolved is enabled
  [i] Systemd-resolved is not enabled
  [✓] Restarting lighttpd service...
  [✓] Enabling lighttpd service to start on reboot...
  [i] Restarting services...
  [✓] Enabling pihole-FTL service to start on reboot...
  [✓] Restarting pihole-FTL service...
  [✓] Deleting existing list cache
  [i] Pi-hole blocking is enabled
  [i] Neutrino emissions detected...
  [✓] Pulling blocklist source list into range

  [i] Target: raw.githubusercontent.com (hosts)
  [✓] Status: Retrieval successful

  [i] Target: mirror1.malwaredomains.com (justdomains)
  [✓] Status: Retrieval successful

  [i] Target: sysctl.org (hosts)
  [✓] Status: Retrieval successful

  [i] Target: zeustracker.abuse.ch (blocklist.php?download=domainblocklist)
  [✓] Status: Retrieval successful

  [i] Target: s3.amazonaws.com (simple_tracking.txt)
  [✓] Status: Retrieval successful

  [i] Target: s3.amazonaws.com (simple_ad.txt)
  [✓] Status: Retrieval successful

  [i] Target: hosts-file.net (ad_servers.txt)
  [✓] Status: Retrieval successful

  [✓] Consolidating blocklists
  [✓] Extracting domains from blocklists
  [i] Number of domains being pulled in by gravity: 134660
  [✓] Removing duplicate domains
  [i] Number of unique domains trapped in the Event Horizon: 112361
  [i] Nothing to whitelist!
  [i] Number of regex filters: 0
  [✓] Parsing domains into hosts format
  [✓] Cleaning up stray matter

  [✓] Force-reloading DNS service
  [✓] DNS service is running
  [i] Pi-hole blocking will be enabled
  [i] Enabling blocking
  [✓] Reloading DNS service
  [✓] Pi-hole Enabled
  [i] Web Interface password: xxx
  [i] This can be changed using 'pihole -a -p'

  [i] View the web interface at http://pi.hole/admin or http://xx.xx.xx.xx/admin

  [i] You may now configure your devices to use the Pi-hole as their DNS server
  [i] Pi-hole DNS (IPv4): xx.xx.xx.xx
  [i] If you set a new IP address, please restart the server running the Pi-hole

  [i] The install log is located at: /etc/pihole/install.log
Installation Complete!
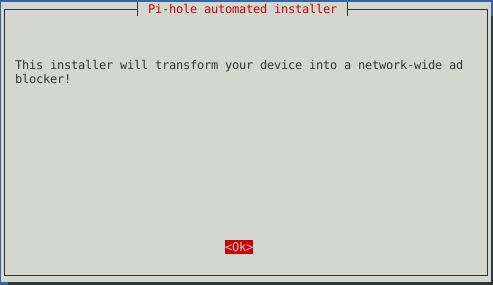
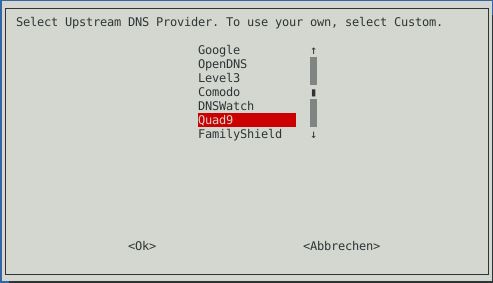
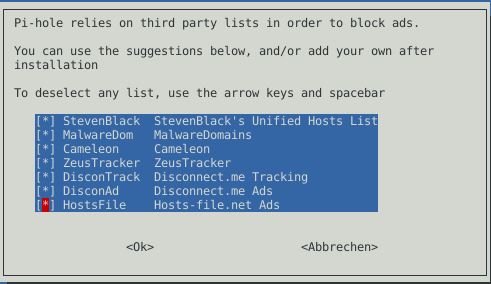
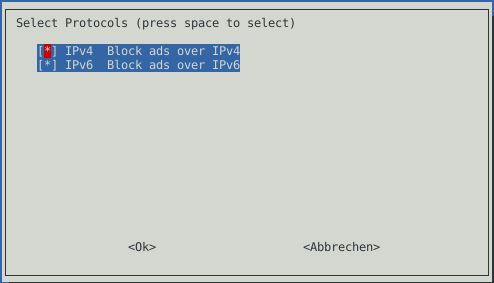
Während der Installation werden verschiedene Punkte abgefragt.
In den ersten Schritten der Installation erfolgt der Hinweis auf die Anpassung des Servers in ein Netzwerkgerät mit Ad-Blocker, statischer IP-Adresse und DHCP und DNS Funktionen.
Pi-hole DNS Provider
Die Auswahl des DNS Provider sollte gut überlegt sein. Es stehen folgende zur Auswahl:
- Google ( https://developers.google.com/speed/public-dns/ )
- Default für Pi-hole
- 8.8.8.8 und 8.8.4.4
- OpenDNS Home von Cisco ( https://use.opendns.com/ )
- 208.67.222.222 und 208.67.220.220
- Level3
- keine Filterung
- fehlerhafte URLs wreden auf eigene Level3 Websuche umgeleitet
- 4.2.2.1 und 4.2.2.2
- Comodo ( https://www.comodo.com/secure-dns/ )
- besitzt eine Secure DNS RBL mit Phishing, Malware, Spyware, geparkten Domains, Seiten mit starker Werbung wie Popups usw.)
- warnt weiterhin vor potentiell gefährlichen Seiten
- 8.26.56.26 und 8.20.247.20
- DNS.WATCH ( https://dns.watch/ )
- schneller, kostenfreier und unzensierte DNS Auflösung
- 84.200.69.80 und 84.200.70.40
- 2001:1608:10:25::1c04:b12f (ipv6) und 2001:1608:10:25::9249:d69b (ipv6)
- Quad9 ( https://www.quad9.net/about/ )
- freie robuste, schnelle und privatsphäre schutzende DNS Server
- 9.9.9.9 und 149.112.112.112 und 2620:fe::fe (ipv6)
- FamilyShield DNS von OpenDNS von Cisco ( https://store.opendns.com/setup/#/familyshield )
- in der Free-Option welche pornografische, geschmacklose und sexuelle Kategorien besitzen und entpsprechende Seiten filtern
- außerdem werden Phishingun Malware gefiltert
- 208.67.222.123 und 208.67.220.123
- 0000:0000:0000:0000:0000:ffff:d043:de7b (ipv6) und 0000:0000:0000:0000:0000:ffff:d043:dc7b (ipv6)
- CloudFlare DNS ( https://cloudflare-dns.com/#explanation )
- wird niemals die IP zur Auswertung und Identifizierung sammeln
- verfügt über einen unabhängigen DNS Monitor DNSPerf unter 1.1.1.1
- schnellste DNS Server
- 1.1.1.1 und 1.0.0.1
- Custom
- ermöglicht die Angabe eines nicht vorkonfigurierten DNS Server
- Liste und Projekte mit freien und privatsphäre schützenden Servern unter: https://servers.opennic.org/
Quelle: https://docs.pi-hole.net
Pi-hole Dashboard aufrufen
Das Passwort wird bei der Installation einmalig angezeigt. Der Aufruf des Dashboard kann über diese 3 Wege erfolgen:
- http://ip-adresse-pihole/admin
- http://dns-name-pihole/admin
- http://pi.hole # wenn als DNS genutzt
Pi-hole Dashboard Passwort ändern
# sudo pihole -a -pPi-hole Blocklisten
Folgende Listen nutze ich:
Einfach alle kopieren und unter Settings -> Blocklist unten in das Feld kopieren und den Button „Save and Update“ anklicken. Eine weitere Anlaufstelle ist die All-in-One Adblock Liste mit über 121 enthaltenen und ständig aktualisierten Listen unter:
Achtung, diese Liste blockt ggf. mehr als man möchte. So musste ich die Domain: „metrics.brightcove.com“ Whitelisten, da ich ansonsten keine Videos auf DMAX sehen konnte.
Damit ist die Installation von Pi-hole abgeschlossen. Wenn der DHCP Server installiert wurde, dann erhalten alle Clients eine IP-Adresse und auch den DNS-Proxy als DNS Server eingetragen. Wer eine Firewall nutzt oder andere DNS Server, muss hier entsprechend den Pi-hole DNS-Server eintragen.
Interessiert in verschiedenste IT Themen, schreibe ich in diesem Blog über Software, Hardware, Smart Home, Games und vieles mehr. Ich berichte z.B. über die Installation und Konfiguration von Software als auch von Problemen mit dieser. News sind ebenso spannend, sodass ich auch über Updates, Releases und Neuigkeiten aus der IT berichte. Letztendlich nutze ich Taste-of-IT als eigene Dokumentation und Anlaufstelle bei wiederkehrenden Themen. Ich hoffe ich kann dich ebenso informieren und bei Problemen eine schnelle Lösung anbieten. Wer meinen Aufwand unterstützen möchte, kann gerne eine Tasse oder Pod Kaffe per PayPal spenden – vielen Dank.
